Beekeeping is an incredibly rewarding hobby, but it also requires a lot of dedication and attention to detail. One of the most important aspects of successful beekeeping is regularly inspecting your hives. Practical hive inspection is crucial for identifying potential problems early, ensuring the health of the colony, and ultimately maximizing honey production. Whether you're a seasoned beekeeper or a beginner, mastering this essential skill will make a significant difference in the long-term success of your apiary.
In this guide, we’ll walk you through the steps of performing a thorough hive inspection, from the tools you'll need to the signs of a healthy colony. We'll also discuss the importance of using the right protective gear, such as best beekeeping suits and beekeeping gloves, to ensure both your safety and the well-being of the bees. By following these steps, you’ll gain confidence in your ability to assess hive health and troubleshoot any issues that arise.
1. Understanding the Basics of Hive Inspections
Before diving into the specifics of hive inspection, it’s important to understand its purpose and how it fits into your broader beekeeping strategy. A regular hive inspection helps you ensure the well-being of the bees and prevent potential problems that could harm the colony. These inspections allow you to:
- Monitor the health and growth of the colony.
- Identify signs of diseases or pests.
- Check for adequate food stores and brood production.
- Ensure the queen is healthy and active.
A beekeeping inspection checklist can be a helpful tool to guide your inspections. The process may vary depending on the time of year, but the core principles of a good inspection remain the same.
2. Preparing for a Hive Inspection: What You’ll Need
A successful hive inspection begins with being properly equipped. The right tools and safety gear will make the process smoother and ensure the bees (and you!) remain safe. Here are the essentials you’ll need before you begin:
Essential Hive Inspection Tools
- Smoker: A smoker is used to calm the bees and prevent them from becoming agitated during the inspection. Be sure to have it lit and producing cool, white smoke before approaching the hive.
- Hive Tool: A hive tool is used to pry apart frames and lift the lid. It’s an essential tool for accessing different parts of the hive without damaging the structure.
- Bee Brush: A soft bee brush helps you gently remove bees from the frames if needed, without harming them.
- Gloves: While some beekeepers prefer to inspect hives without gloves for better dexterity, gloves are important for protecting your hands, especially if you're a beginner.
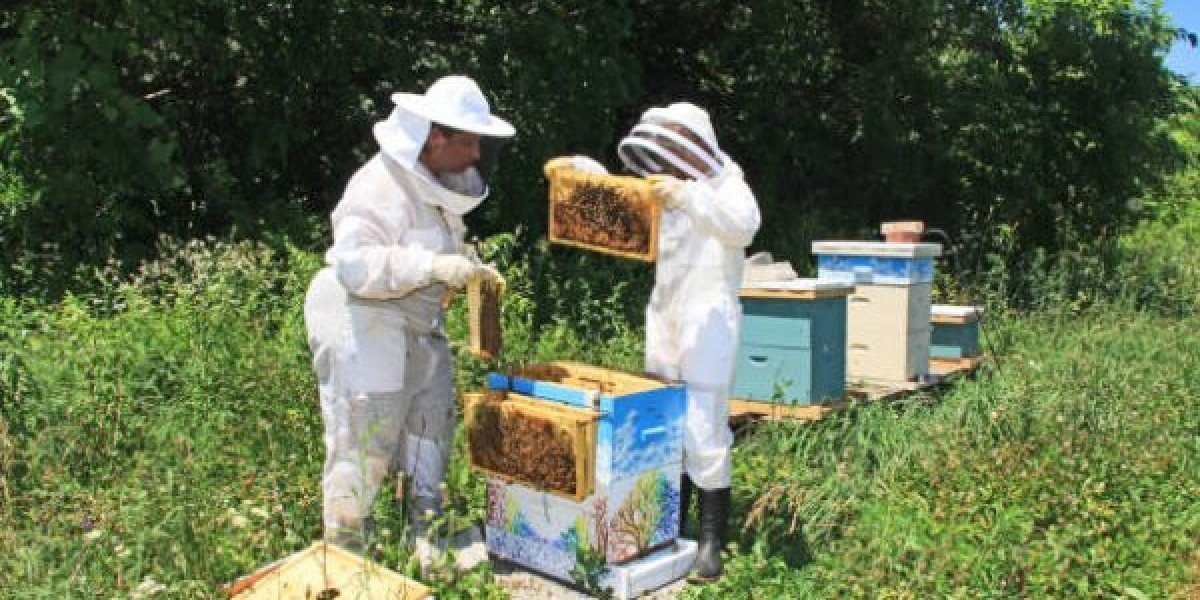
- Protective Clothing: A veil, jacket, and full suit are recommended for protection against stings. Even experienced beekeepers can occasionally get stung, so it's best to wear protection during inspections.
Weather and Timing Considerations
The best time to inspect your hive is during a warm, sunny day when the bees are active and the temperature is between 55°F and 95°F (13°C to 35°C). It’s also best to avoid inspecting the hive on rainy days or during very hot weather, as these conditions can stress the bees.
3. Step-by-Step Guide to Inspecting Your Hive
Once you’ve gathered all the necessary tools and ensured the weather is favorable, it’s time to begin your practical hive inspection. Follow these steps for a thorough and effective check:
Step 1: Opening the Hive and Using a Smoker
The first step is to gently lift the lid of the hive. Use your hive tool to break the seal and separate the top box from the lower ones. Before doing this, puff some smoke near the entrance and around the top to calm the bees. Bees generally become more docile when exposed to smoke, which mimics the scent of smoke from a fire and encourages them to gorge on honey, thus keeping them busy and less aggressive.
Step 2: Inspecting Hive Frames for Bees, Honey, and Brood
Once the hive is open, carefully begin inspecting the frames. Use the hive tool to gently lift each frame and inspect both sides for the following:
- Bees: Look for a healthy population of adult bees. If there are fewer bees than expected, or if the population seems unusually aggressive or weak, this could be a sign of trouble.
- Honey Stores: Check for honey reserves. A healthy colony should have enough honey to last through the winter. If stores are low, you may need to supplement the hive with sugar syrup or other food sources.
- Brood Pattern: The brood (larvae and pupae) should be organized in a solid, consistent pattern. Gaps or disorganized brood patterns could indicate problems with the queen or the hive’s overall health.
Step 3: Identifying the Queen and Her Health
One of the most critical aspects of a hive inspection is locating the queen. While finding the queen can sometimes be challenging, it’s important to check her status:
- Presence of Eggs: A queen that’s laying eggs is a strong indication of a healthy hive. If no eggs are found, or if the brood pattern is irregular, the queen may be absent or failing.
- Queen’s Behavior: A healthy queen will be active, laying eggs regularly, and moving around the frames. If she seems sluggish or is being aggressively attacked by worker bees, she may need to be replaced.
Step 4: Checking for Pests and Diseases
Hive pests and diseases are some of the most common problems beekeepers face. Inspecting hive frames for these issues is critical:
- Varroa Mites: These parasitic mites are one of the most destructive threats to honeybees. Check for signs of mite infestation, such as deformed bees or mites themselves on bees or brood.
- Nosema: A fungal disease that affects bees' digestive systems. Signs include bees with bloated abdomens or difficulty flying.
- Foulbrood: A bacterial disease that can kill larvae. Check for discolored, rotting brood and a foul smell.
By recognizing these signs early, you can take action to prevent further damage to the hive.
4. Common Problems to Look for During Hive Inspections
As you perform your hive inspections, there are a few common problems that you should be on the lookout for. Here’s a list of potential issues and what they might indicate:
- Weak Hive Health: If the colony seems small, or if there’s a lack of brood and honey stores, the hive may be in trouble. This could indicate that the queen is failing, or there’s an environmental factor causing stress.
- Swarming Behavior: If you notice an unusually large number of bees flying around the hive, they may be preparing to swarm. Swarming is a natural process, but it can result in a loss of bees. Be sure to monitor for signs of impending swarming, such as queen cells or bees clustering outside the hive.
- Aggressive Bees: If your bees are unusually aggressive or defensive, it could indicate an issue with the hive. This might be caused by stress, pest problems, or environmental factors.
5. Seasonal Hive Inspection Considerations
The frequency and focus of your hive inspections will vary depending on the season. Here’s a breakdown of what to focus on throughout the year:
Spring and Summer Inspections
During the warmer months, the hive will be growing rapidly. Focus on:
- Brood Production: Ensure the queen is laying regularly and that there is a consistent brood pattern.
- Honey Stores: Make sure the colony has enough resources to support rapid population growth.
- Swarming Prevention: Keep an eye out for signs of swarming and manage space in the hive to prevent overcrowding.
Fall Hive Checks
In the fall, your focus will shift to preparing the hive for winter:
- Honey Reserves: Ensure the colony has enough honey for the winter months. Consider supplementing if stores are low.
- Health Checks: This is the time to address any pest or disease issues before the cold weather sets in.
Winter Hive Care
While you won’t need to open the hive often during the winter, it’s important to:
- Check the Hive’s Weight: Make sure the hive is still heavy with honey and that the colony is not starving.
- Monitor the Temperature: If it gets too cold, you may need to add insulation or move the hive to a more sheltered location.
6. Maintaining Hive Health Between Inspections
Even between inspections, there are small tasks you can do to keep your hive in good condition:
- Regularly Check for Pests: During warmer weather, periodically check for pests such as ants or wasps that may try to invade the hive.
- Replenish Food Stores: If the bees are running low on honey, you can supplement their diet with sugar syrup or fondant, especially during winter months.
Conclusion
Mastering practical hive inspection is an essential skill for any beekeeper. Regular inspections allow you to monitor the health of your colony, detect potential problems early, and ensure the overall success of your beekeeping efforts. By using the right tools, following a thorough step-by-step approach, and staying vigilant throughout the year, you’ll be able to maintain healthy hives that thrive year after year.
In addition to the tools needed for inspection, it's also crucial to wear the proper beekeeping gear to ensure your safety and comfort while working with your bees. Investing in high-quality beekeeping suits, gloves, veils, and boots will not only protect you from stings but also help you approach the hive with confidence. Proper protective gear allows you to focus on the task at hand without distractions, ensuring that your inspections are as smooth and efficient as possible.