360 wigs have become a popular choice for those looking to achieve a natural and versatile hairstyle. These wigs offer a 360-degree lace band around the perimeter, allowing for various styling options, including high ponytails and updos. In this tutorial, we will guide you through the process of customizing your 360 wig to ensure it fits perfectly and looks stunning.
Understanding 360 Wigs
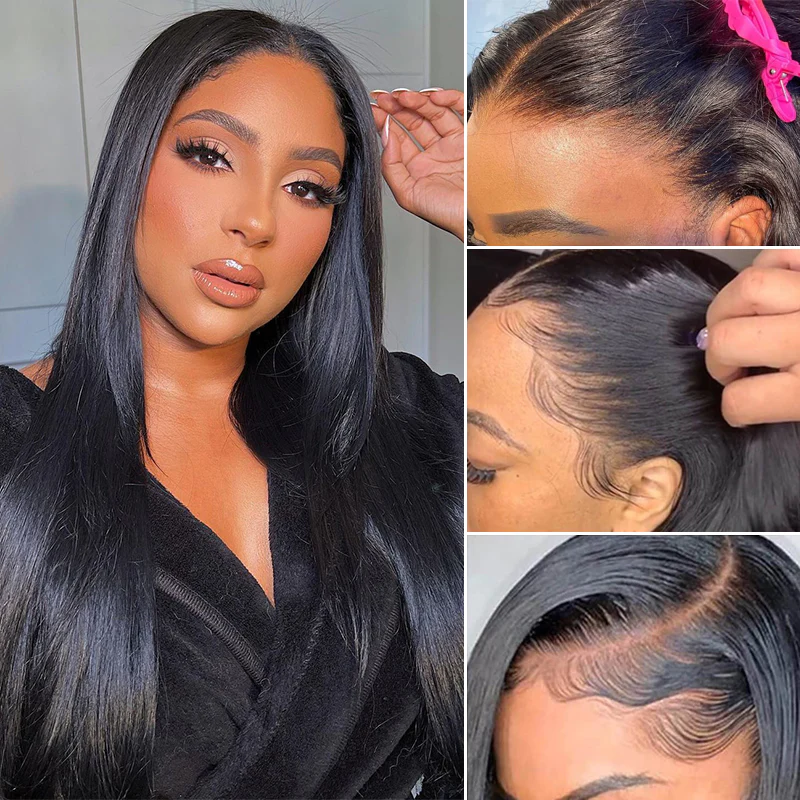
Before diving into the customization process, it's essential to understand what makes 360 wigs unique. Unlike traditional wigs, 360 wigs feature a lace band that encircles the entire head, providing a more natural hairline and greater styling flexibility. This design allows for a seamless blend with your natural hair, making it an excellent choice for those seeking a realistic look.
Benefits of 360 Wigs
- Natural hairline and appearance
- Versatile styling options
- Comfortable and breathable
- Easy to install and remove
Step-by-Step Customization Process
Customizing your 360 wig involves several steps, each crucial for achieving a perfect fit and natural look. Let's explore these steps in detail.
1. Preparing Your Wig
Start by washing your 360 wig with a gentle shampoo and conditioner. This step removes any factory residues and prepares the wig for customization. After washing, let the wig air dry completely.
2. Bleaching the Knots
Bleaching the knots on your 360 wig helps to create a more natural scalp appearance. Mix a bleach powder and developer according to the instructions, then apply the mixture to the lace using a brush. Allow the bleach to process for the recommended time before rinsing it out thoroughly.
3. Plucking the Hairline
To achieve a realistic hairline, you will need to pluck some hairs from the front of the wig. Use tweezers to carefully remove hairs, creating a gradual and natural-looking hairline. Be patient and take your time to avoid over-plucking.
4. Customizing the Cap Size
Ensuring that your 360 wig fits snugly is essential for comfort and security. Adjust the straps and combs inside the wig to fit your head size. If necessary, you can also sew additional elastic bands for a more secure fit.
Styling Your 360 Wig
Once your 360 wig is customized, it's time to style it to your liking. You can use heat tools, such as curling irons and straighteners, to achieve your desired look. Remember to use heat protectant products to prevent damage to the wig fibers.
"The versatility of 360 wigs allows for endless styling possibilities, making them a favorite among beauty enthusiasts."
Recommended Products
For the best results, consider using high-quality products designed specifically for wigs. Here are some recommendations:
Conclusion
Customizing your 360 wig can seem daunting, but with the right steps and tools, you can achieve a flawless and natural look. By understanding the unique features of 360 wigs and following our step-by-step guide, you'll be well on your way to enjoying a versatile and stunning hairstyle.
Additional Resources
For more information on 360 wigs and customization tips, check out this video tutorial.
References